Updated Muffin Recipe

Gluten-free Dairy-free muffins

Fall hasn’t truly set in here but the urge to spend more time in the kitchen has shown up on time anyway. We didn’t need muffins in the house, especially now that we are down to two, but muffin baking beckoned regardless. My original vegan take on Bob’s Red Mill gluten-free recipe for blueberry muffins can be found here, but it never quite right to me. Yesterday, instead of looking at what I’d done before, I started from scratch with Bob’s recipe and modified it anew, but this time I used eggs instead of an egg replacer. If you want these to be vegan, just use your favorite egg replacement. (Mine is simply to use 1 tablespoon of flax seed meal with 3 tablespoons of warm water per egg.) As last time, my recipe does not include any berries because my son prefers baked goods without berries, but 1.5 cups of blueberries can be added, or if you have raspberries, those would be especially good with the vanilla and cinnamon. These muffins are great without any berries though and taste almost like a biscuit, but not quite. (I think the 2 teaspoons of baking powder are also what give it a biscuit-y taste.)

This recipe that I manipulate is right on the back of Bob’s Red Mill’s Gluten-free One-to-One flour which is my favorite gf flour for baked goods. It’s easy to use and it saves me from buying a handful of different flours to mix and match trying to find the perfect blend. The other main thing I do with this recipe is to reduce the sugar by quite a bit, and to use both cane sugar and brown sugar. This might be why my muffins end up tasting somewhat like a biscuit instead of just a pure muffin, but they are still tasty as can be. Whenever I make these, I go ahead and double the ingredients to make 24 muffins, but the following is for 12 regular-sized ones.

Vanilla-Cinnamon Gluten-free, Dairy-free Muffins

(I am affiliated with Mountain Rose Herbs but not with any of the other pages I have linked to.0

2 Cups Bob’s Red Mill GF 1-to-1 Baking Flour

2 tsp baking powder

1/2 tsp salt

1/2 cup vegan butter

1/2 cup cane sugar

1/2 cup brown sugar

1 tsp cinnamon

1 tsp vanilla extract (here’s how to make your own!)

2 eggs

1/2 Nutpod French Vanilla Oat Creamer

1.5 cups of optional ingredients such as blueberries, raspberries, or even chocolate chips

Start by preheating oven to 425 degrees and prepping your muffin pan with either paper liners or spray oil. Add the dry ingredients (besides the sugar) together in a bowl and stir. Cream the sugar and softened vegan butter together with a hand mixer. Add the vanilla and mix again. Add the eggs and mix, then add the dry ingredients a bit at a time while mixing, rotating with adding the half cup of oat creamer. At this time, you can add in any other ingredients that you want, such as 1.5 cups berries or chocolate chips, but they taste great just plain. It’s a very thick batter, not runny at all. Scoop the batter into a prepared muffin pan for 12 normal sized muffins. Put the pan in the oven and immediately turn down the temperature to 375 degrees. Bake for 30 minutes, then let them cool on a cooling rack for at least five minutes before digging in.

Gluten-free, Dairy-free Muffins that you can add berries to if you like or eat plain like we do

I hope the call to the kitchen continues and I get back to soup making soon, but where I live has a tiny kitchen compared to my old place which makes it a little less inviting. I shouldn’t complain, and I’m not because honestly, I love where I live and think it’s far better than my old place for many reasons, but cooking just hasn’t been the joy it once was lately. I’m finding joy in other things though, and I hope you too are indulging in joys every day.

Happy fall y’all! 🍂 (And happy spring to those in the southern hemisphere🌷).

Vegan, GF, Vanilla Pound Cake

If you’ve visited here for a year or more, you certainly know by now that I’m not a fan of traditional Thanksgiving foods. Although, I must say that as far as those foods go, the desserts aren’t bad, but if you are looking for something else to add to holiday get togethers (wait, are we going to be able to get together at all this season?) scratch that. If you are looking for an easy dessert to have around the house this holiday season, or to gift your gluten-free and/or vegan friends, this is an easy, yummy recipe and it can be customized according to your tastes. Plus, pound cake in an appropriate breakfast food, right? Add some Greek (DF) yogurt and a satsuma, or an apple with peanut butter, and you have a full meal. Really, a pound cake is basically a muffin in a different shape when you think about it.

I looked for a simple recipe online that I could easily change to gluten-free, dairy-free, and egg-free, and this one from Dinner then Dessert worked well. It lured me in with an advertised ten minute prep time and hour bake time, and it didn’t let me down. This was the easiest thing I’ve baked lately and my sons and I have enjoyed every bite.

Here’s the recipe, but keep in mind it’s completely customizable to your own dietary needs and tastes. You can add chocolate chips or cinnamon for example, which I considered, but then decided to keep it purely vanilla. If you don’t do dairy but eggs work for you, I recommend using the eggs instead of the flax if you want that pretty golden color that pound cakes wear so well. Mine turned out more of a dull brown than golden but it still shined in taste. Here’s the recipe:

GF, Vegan Pound Cake (Modified from Dinner then Dessert by Sabrina Snyder)

Ingredients:

  1. Preheat the oven to 350 degrees and prep a 8×4 inch loaf pan with a coating of vegan butter or spray with coconut oil. Sprinkle a small bit of flour on top of the oil/butter. Also, my loaf pans are 9×5 so the pound cake came out a bit shorter and wider, but it works.
  2. Mix the flax seed meal with the warm water and set aside. I always do this in a mig for easing pouring.
  3. Mix the vegan butter and sugar with a handheld mixer, or in a standing mixer. on high speed and beat until light and fluffy. It takes a couple of minutes for the mixture to get fluffy and really this is the most labor intensive part of the recipe. Trust me, it’s worth the three minutes.
  4. Turn down the speed of the mixer and add the vanilla and the flax mixture (these can be in the same mug), mix a bit and then add the milk alternative.
  5. Add in the flour, baking powder, salt, and anything else you want in your cake and mix until just combined. It’s ready to pour into the loaf pan and bake for an hour. Cool on a wire rack before digging in.

Have a great Thanksgiving if you are in the U.S. and I hope everyone, everywhere, has a lovely start to the holiday season.

Peace and Gratitude to all ☮🙏✨

Does Anyone Know What Day it is?

I just got back from a walk and on it I tried to remember if schools had been closed for two weeks as of tomorrow, or three…? These days are running together in a blur and I have the building anxiety that I need to move on from the initial stages of getting used to this new ‘normal’ and start being productive and constructive again, but honestly the only thing I’ve been doing more of is sleeping. I have been taking walks, making food, and trying to do some dance cardio in my bedroom but it’s just not the same on carpet and with no other goofballs cardio-dancing next to me. Even cooking has been difficult since we moved into a new house at the same time as all this pandemic craziness really got going and by ‘new’ I mean new to us, it is a middle-aged house by human years’ standards and I don’t think anything has been updated since its rebellious teen years at best. The refrigerator freezes our produce no matter how warm I make the temperature, and it has also frozen some sauces and salads. The stove top is one of those flat ones and I don’t even know what the material is but I don’t care for it one bit. It just makes cooking more difficult for now, although I’m sure I’ll eventually figure out the issue with the fridge, or have yet another service guy out here to do it, but for now we are just dealing with it. I did see a pho recipe recently that got me excited though, not only because it’s a noodle soup and I love noodle soups, but also because it’s just for two which means I won’t have leftovers that might potentially freeze in our refrigerator. Not that leftovers are often a problem with two teen boys in the house, but best not to take any chances. In case you are new to pho, which is pronounced, I’m told, close to fu? with a lift at the end like a question, it is a Vietnamese soup that is packed with nutrients. It is usually made with pork or beef, but you can find chicken or vegetarian versions such as the one I intend to make later this week when I get back out to a grocery. What makes pho unique is the use of spices such as star anise, cinnamon, and ginger which are excellent for the digestive system and for supporting the immune system. Keep in mind that star anise is the primary source for the main ingredient in Tamiflu. Herbs are powerful indeed.

Here’s a link to the vegan pho on Frontier Coop’s website. Let me know if you make it or have your own go-to pho recipe. By the way, restaurants are very clever out here with naming their Vietnamese restaurants which I never understood until someone explained the pronunciation to me. My favorites are: What the Pho? and Pho King.

Stay safe and stay sane.


Plant Based Diet Hacks

Whether you are vegetarian, vegan, or just trying to add more produce to your meals, plant-based meal planning seems to be a here-to-stay trend, and I think it’s a good one. There are no diets that are perfect for everyone, so I like the term ‘plant based’ to acknowledge there are many ways to look at eating more plants than animals in general. According to Blue Zones studies, the people who live the longest and are healthiest in their long lives are pescatarians, and even at that, they are not rigidly so. Flexibility, open-minded-ness, and intuition will take you much farther in terms of optimal health than any strict diet rules. (Unless you need to avoid something for allergy purposes of course. That’s always a hard and fast rule.) The most recent sample box from New Hope Influencer Co-op had some great veggie options to make plant-based eating easy and interesting. Here are some of the foods my family and I sampled:

Elma Farms POSHI marinated vegetable snacks are delicious. The bags say that you can snack on them right out of the bag, which we did, or use them on pizza, salad, or pasta, which I will try in the future. I’ll definitely be buying more of these to send in my son’s lunches and to use at home for easy veggie additions to meals. The packaging is beautiful too. Loved these.

My sons and their friends greatly enjoyed R.W. Garcia Co’s organic Bar-B-Q corn chips. The whole bag was gone in one play date with four teen boys chowing down. I never knew my kids even liked Bar-B-Q flavored chips so that was good to find out. I definitely appreciate the fact they are organic.

If you are a potato lover, you will definitely want to check out these potatoes from The Little Potato Company. The ones we tried were Garlic and Parsley flavored and quite good. It’s an interesting idea that I hadn’t seen before~ whole potatoes packaged with a seasoning pack that just gets added once the potatoes are cooked in the microwave for 5 minutes. We added olive oil too, as the package suggests butter or oil can indeed be added with the seasoning packet. Talk about a quick, filling, easy veggie meal!

This dairy-free ‘cheddar’ snack from Ancient inGRAINed Snack Co called Ka-pop tasted to me like a real cheddar popped cracker. It will definitely get any vegan or dairy intolerant person through a cheesy cracker craving! They are thick and substantial too, so it isn’t like you are eating air like some popped snacks. This is actually a filling dairy-free cheddar tasting snack.

Jenny’s Gourmet Foods has this pressed ‘salad bar‘ which is more like fruit leather than a bar, but I like the play on words that they did there. My son ate this and gave me a corner of one (there are two strips in the package) and we both liked it. Because of the texture it really reminded us of fruit leather except it isn’t sweet at all. It is also more substantial than fruit leather and my son called it ‘filling’, and with the exceptional ingredients in it, that’s a good way to get filled up.

seedsofchange

Seeds of Change makes these Quinoa and Brown Rice packs that are an easy way to get your whole grains into a meal. You can add steamed or roasted veggies to the grains, or throw the grains on top of fresh greens to make a hearty salad bowl. This one with garlic is tasty and I love the ease of these, especially for summer grain bowl meals. These would also be a great choice to take camping or for other travels this summer.

bfreepita

We haven’t tried these gluten-free pita breads yet from BFree foods, but I am very excited to do so. If you have been eating gluten-free for a while, you have no doubt already noticed a lack of pita bread or naan out there. I tried BFree products while in Dublin and thought they were great, and in fact mentioned them in my 2017 blog post on Dublin, about how I was hoping I’d find them here at some point. I am so excited they are available in the U.S. now and that they have the rare, illusive, gluten-free pita! This is a  much needed addition to our world.

Serenity Tea Sips sent along a lovely combination of Bergamot and Jasmine tea complete with black and green teas, rose buds, mallow and jasmine blossoms, and flavoring which I assume is the bergamot. This is a loose leaf tea and it smells wonderful. As soon as I’m finished with my current container of matcha, I’ll be sipping this tea in the afternoons for a pick me up with a dose of calm energy, thanks to the rose buds, mallow, and jasmine. Calm energy is the best kind for stamina, focus, and feeling good. People often associate calm with tiredness, but calm is the frame of mind that allows for optimal thinking, decision-making, focus, and long term stamina.

I’ll share the supplements from the sample box next time. Thank you for reading and I hope you found something new to try.


International Veggie and Grain Bowls

I once heard Lynne Rossetto Kaspar on The Splendid Table (when she was still the host) advise someone who wanted to learn to cook to simply start with sauteing seasonal veggies in olive oil on the stove top, make any grain product to go with it and add the two together. She also said that meat could be added if wanted, or beans or some other protein, but to start with what produce is in season and whatever grain product sounds good with it~ rice, quinoa, pasta, bread, couscous…you get the picture. I love that advice and how easily you can add herbs, spices, and sauces to create many different flavors while using the same basic foods and techniques. Spring is a perfect time to put her advice into action with simple grain bowls that can take on any region’s flavors with a few choice ingredients and happily, just one or two pots. Here are five recipes to take you on a world tour to add some cultural flavors without much fuss to your week.

The following parts of this post (until the last paragraph) were provided by New Hope Network. I am a member of the New Hope Influencer Co-op, a network of health and wellness bloggers committed to spreading more health to more people. These recipes were created by New Hope Network and Jane Burnett, RD, with photos by Jennifer Olson.

Recipe 1:

middle eastern bowl

Middle Eastern flavors: The cuisine of various countries in the Middle East—including Indian, Arab, Israeli, Greek, Persian, Turkish and Armenian food—is diverse, but typically used ingredients include chickpeas, olives, olive oil, rice, dates, honey, mint and parsley. Family-style eating, in which people take their food from a communal plate in the center of the table, is common in the Middle East. For authenticity sake, place the grain bowl components in the center of the table and let diners assemble their own.

Tahini-Chickpea-Pistachio Bowls 

Makes 6 servings; Vegan

For the Pickled Red Onions

2 cups water

½ cup red wine vinegar

2 teaspoons salt

2 teaspoons agave syrup

2 cups thinly sliced red onions

For the Tahini cream

½ cup tahini

6 tablespoons fresh lemon juice

¼ cup water

1 tablespoon ground cumin

1 teaspoon ground black pepper

½ teaspoon salt

For the Bowls

1 pound cauliflower, cut into small florets

4 cups ¾-inch sweet potato cubes (2 medium)

3 tablespoons olive oil

1 tablespoon yellow curry powder

½ teaspoon dried thyme

2 cups cold water

1 cup dry quick-cooking bulgur (TRY: Bob’s Red Mill)

1 (15-ounce) can chickpeas, drained and rinsed

1/3 cup pitted and chopped kalamata olives

½ cup shelled, roasted pistachios

½ cup fresh flat-leaf parsley


  1. The night before serving, prepare Pickled Red Onions: In a saucepan over high heat, bring water, vinegar, salt and agave syrup to a boil. Remove from heat, and stir in sliced red onions. Let mixture cool to room temperature; then refrigerate overnight.
  2. Preheat oven to 400°. Prepare Tahini Cream: In a blender, combine all Tahini Cream ingredients; blend until smooth, and refrigerate until ready to use.
  3. In a large bowl, toss cauliflower florets and sweet potato cubes with oil, curry powder and thyme. Spread vegetables in a single layer on a baking sheet with no edges. Roast cauliflower and sweet potatoes for 30–40 minutes, stirring every 8–10 minutes, until tender and browned.
  4. In a pot over medium-high heat, bring 2 cups water and bulgur to a boil. Cover, and simmer for 12 minutes or until bulgur is tender. If bulgur is soggy after 12 minutes, reduce heat to low and cook 1–2 minutes more. Remove pot from heat, and stir in chickpeas and olives.
  5. To serve, divide bulgur mixture among bowls. Top with roasted cauliflower, sweet potatoes and Pickled Red Onions. Serve with a generous dollop of Tahini Cream, and garnish bowls with pistachios and parsley.

PER SERVING (1½ cups): 505 cal, 21g fat (11g mono, 7g poly, 3g sat), 0mg chol, 641mg sodium, 66g carb (14g fiber, 7g sugars), 16g protein

Recipe 2:

Mexican bowl

Mexican flavors: Mexican cuisine is primarily a fusion of indigenous Mesoamerican cooking with Spanish elements added in. Staples of the
food culture include corn, beans, avocados, tomatoes and chile peppers. This flavorful grain bowl incorporates all the familiar flavors of Mexican food, with a spicy, creamy polenta as the base.

Green Chile Cheese Polenta Bowls

Makes 5 servings; Gluten free, Vegetarian, Staff favorite

For the Black Bean Relish

1 (14.5-ounce) can black beans, rinsed and drained

2 Roma tomatoes; seeded and chopped

½ cup chopped red bell pepper

¼ cup diced red onion

1 ripe avocado; pitted, peeled and diced

1 tablespoon fresh lime juice

½ cup loosely packed fresh cilantro

1 clove garlic, minced

1 tablespoon extra-virgin olive oil

1 tablespoon red wine vinegar

¼ teaspoon salt

For the Polenta

4 cups water

½ teaspoon salt

1 cup polenta (corn grits or stone-ground whole cornmeal)

1 cup shredded sharp cheddar cheese

1 tablespoon butter

½ cup medium Hatch flame-roasted green chile (TRY: 505 Southwestern)

1 tablespoon extra-virgin olive oil

1 (5-ounce) package coarsely chopped kale

¼ teaspoon ground black pepper

½ cup pepitas, toasted


  1. Prepare relish: In a medium bowl, combine beans, tomatoes, bell pepper and red onion. Toss avocado with lime juice; add bean mixture along with cilantro, garlic, oil, vinegar and salt. Gently toss to combine, and set aside at room temperature.
  2. In a large saucepan, bring water and 1 teaspoon salt to a boil. Whisk polenta into the boiling water, and decrease heat to low. Simmer on low for about 15 minutes, whisking often until mixture thickens and corn granules are tender. Remove pan from heat, and stir in cheese and butter until melted. Stir in green chile, cover, and set aside.
  3. In a large skillet over medium-high heat, heat 1 tablespoon oil. Add kale, and sprinkle with pepper; sauté 3–4 minutes until kale starts to soften.
  4. To serve, divide polenta among bowls and top each with a portion of the sautéed kale and Black Bean Relish. Sprinkle with pepitas, and serve warm.

PER SERVING (1¾ cups): 551 cal, 23g fat (11g mono, 5g poly, 7g sat), 21mg chol, 762mg sodium, 68g carb (12g fiber, 3g sugars), 19g protein

Recipe 3:

Italian bowl

Italian flavors: Gathering and lingering over food is central to Italian culture.
The dishes employ simplicity, relying on high-quality ingredients rather than elaborate presentation. Many dishes feature tomatoes, bell peppers, potatoes, wine and cheese. A natural plant-based cuisine, modern Italian focuses on the nuances of its regions, though nationwide the emphasis is on food produced by the earth.

Italian Herbed Farro Bowls

Makes 6 servings; Vegetarian

2 cups uncooked farro

6 cups water

3 tablespoons extra-virgin olive oil, divided

4 cloves garlic, minced

1 large fennel bulb, cut into 1 /8-inch slices

2 cups ¼-inch carrot slices (3 large carrots)

1 cup halved cherry tomatoes

1 cup dry white wine

½ teaspoon fennel seed, crushed

Juice and peel of 1 lemon, divided

1 tablespoon dried, mixed Italian herbs

½ teaspoon salt

¼ teaspoon ground black pepper

1 (5-ounce) package baby spinach

¼–½ teaspoon crushed red pepper flakes

¼ cup snipped flat-leaf parsley

½ cup coarsely chopped almonds, toasted

¼ cup shredded Parmesan cheese

  1. Rinse farro. In a large saucepan, place farro and water. Water should cover farro. Bring to a boil; then reduce heat and simmer until tender, stirring once or twice, about 30 minutes. Drain excess water.
  2. Meanwhile, in a very large nonstick skillet over medium-high heat, heat 1 tablespoon oil. Add garlic and sauté until softened, about 3 minutes. Add another 1 tablespoon oil, along with sliced fennel and carrots. Reduce heat to medium and cook, stirring often, until vegetables are crisp-tender and browned, 10–12 minutes. Remove skillet from heat, and add tomatoes, wine and fennel seed. Return to heat, and cook until almost all the liquid has evaporated and tomatoes are tender, about 5 minutes. Stir in 2 tablespoons lemon juice, lemon peel, Italian herbs, salt and pepper. Remove from heat, and add spinach leaves; toss until spinach is slightly wilted.
  3. To farro, add remaining 1 tablespoon oil, 1 tablespoon lemon juice, red pepper flakes and parsley; toss.
  4. To serve, divide farro mixture among bowls and top with vegetable mixture. Garnish with almonds and Parmesan.

PER SERVING (1¼ cups): 322 cal, 13g fat (9g mono, 2g poly, 2g sat), 2mg chol, 354mg sodium, 35g carb (7g fiber, 5g sugars), 10g protein

Recipe 4:

Korean bowl

Korean flavors: Korean cuisine is steeped in agricultural traditions and known for having a lot of side dishes. Here we combine some of the most common flavors in one bowl. Kimchi—which is salted, seasoned and fermented cabbage and radishes—is used as a condiment and present at almost every Korean meal. Other frequently used ingredients include soy sauce, ginger, garlic, napa cabbage and gochujang, which is fermented red chile paste. Look for it in the Asian section of your local natural products store.

Spicy Korean Quinoa, Veggie & Tofu Bowls

Makes 6 servings; Gluten free, Vegan, Staff favorite

For the Citrus Soy Dressing

¼ cup fresh orange juice

3 tablespoons reduced-sodium soy sauce or tamari

2 tablespoons freshly squeezed lemon juice

1 tablespoon honey

1 teaspoon lemon zest

For the Bowls

1 (14-ounce) package extra-firm tofu, well-drained
and cut into ½-inch cubes

3 tablespoons gochujang (Korean fermented red chile sauce)

4 tablespoons vegetable oil

3 cloves garlic

8 ounces thickly sliced baby bella mushrooms

8 cups thinly sliced napa cabbage (1 medium)

4 cups sliced zucchini

½ teaspoon salt

4 cups hot, cooked quinoa

1 large, ripe avocado; sliced

¾ cup spicy kimchi

4 teaspoons black or white sesame seeds

Sriracha sauce (optional)

  1. Prepare Citrus Soy Dressing: Place all dressing ingredients in a jar with lid; close lid, and shake vigorously until blended. Refrigerate until needed.
  2. In a bowl, carefully toss tofu cubes with the gochujang; refrigerate from 30 minutes up to overnight. While tofu is marinating, prepare vegetables.
  3. Preheat oven to 400°. Line a rimmed baking sheet with aluminum foil, and rub generously with 2 tablespoons oil to prevent tofu from sticking. Spread tofu in a single layer on baking sheet. Bake tofu in lower third of oven for 10 minutes. Remove, and carefully turn tofu pieces over with a thin spatula.
    Bake another 10 minutes, remove and turn again. Bake another 5 minutes.
  4. Meanwhile, in a large skillet over medium-high heat, heat 1 tablespoon oil. Add garlic and mushrooms; sauté 5–6 minutes or until mushrooms are tender and liquid has cooked off. Remove mushrooms to a plate, and set aside. Add remaining 1 tablespoon oil to same skillet, and reduce heat to medium. Add cabbage and sauté, stirring often, for 8 minutes. Add sliced zucchini and salt to skillet with cabbage. Continue to sauté until cabbage begins to brown and zucchini is tender but still bright green, about 8 minutes.
  5. To serve, divide hot quinoa among bowls. Top with piles of cabbage and zucchini mixture, mushrooms, baked tofu, avocado and kimchi. Drizzle 2 tablespoons Citrus Soy Dressing over each serving and sprinkle with sesame seeds and Sriracha, if using.

PER SERVING (1½ cups): 472 cal, 17g fat (9g mono, 6g poly, 2g sat), 0mg chol, 573mg sodium, 56g carb (8g fiber, 8g sugars), 18g protein

Recipe 5:

Thai bowl

Thai flavors: Balance and texture are paramount in Thai cuisine; most dishes contain elements of sweet, salty, spicy and bitter tastes. This dish hits all those familiar flavor spots: sweet from the apples and red peppers, salty and spicy from the peanut sauce and bitter from the brussels sprouts. Chef David Thompson, a Thai food expert, says that Thai cuisine—unlike many others—rejects simplicity and is about “juggling disparate elements to create a harmonious finish.”

Jasmine Rice, Edamame & Apple Bowls with Peanut Sauce

Makes 4 servings; Gluten free, Vegan

1 cup uncooked white or brown jasmine rice

1 cup frozen, shelled edamame

3 tablespoons coconut oil

4 cups trimmed and quartered brussels sprouts (1 pound)

1 large sweet red pepper, seeded and julienned

2 medium Granny Smith apples, julienned

½ cup purchased or Homemade Peanut Sauce (see recipe below to make your own)

½ cup coarsely chopped roasted peanuts

Fresh cilantro leaves

  1. Cook rice according to package directions. Add edamame to rice for last 3 minutes of cooking time. Remove from heat, but keep covered.
  2. In a large skillet, heat coconut oil. When oil is melted, sauté quartered brussels sprouts and red pepper slices until brussels sprouts are crisp-tender and bright green but starting to brown, 5–6 minutes. If skillet gets too dry, add a few tablespoons of water. Turn off heat, and cover skillet on stovetop to allow vegetables to steam for 2–3 minutes more.
  3. To serve, divide rice-edamame mixture among bowls. Arrange sautéed vegetables and apples over rice. Top each serving with 2 tablespoons purchased or Homemade Peanut Sauce*, and garnish with peanuts and cilantro.

PER SERVING (2 cups): 638 cal, 27g fat (10g mono, 6g poly, 11g sat), 0mg chol, 91mg sodium, 78g carb (14g fiber, 24g sugars), 18g protein

*Homemade Peanut Sauce: In a bowl, combine 1/3 cup natural peanut butter; 1 tablespoon each minced garlic, soy sauce or tamari, peanut oil, sesame oil and rice wine vinegar; 2 teaspoons honey and ¾ teaspoon ground ginger; whisk to combine. Add 5 tablespoons water and ¼ teaspoon Sriracha; whisk again.

Thank you for reading! I hope at least one of these bowls sounds tasty to you and inspires you to experiment. Please share with anyone who might need some new ideas on implementing more plant-based meals in their life.

Roasted Sweet Potatoes

Just a quick recipe this week that can be a healthy side at your Thanksgiving meal. With all the complicated foods that can be part of the meal prep, this one is thankfully straight-forward and simple with just chopping taking up most of the time. Truthfully though, we eat this dish all winter long because it’s so tasty that it’s kind of addictive actually. The garlic is really what makes it so special so add as many cloves as you like, and any kind of sweet potato works, including the ones called yams.

Roasted Sweet Potatoes with Leeks and Garlic

4 sweet potatoes

1 large leek

at least 6 garlic cloves but as many as you want

olive oil to cover

black pepper to taste

sea salt or seasoning salt to taste (I use the seasoning salt and it’s also really delicious with eggs, fish, and any vegetable dishes.)

Preheat oven to 425. Cut the sweet potatoes up into bite size pieces and spread on an oiled cookie sheet or use parchment paper. Spread the cut up leek on top of the sweet potatoes and place the garlic cloves all around. Pour olive oil over the veggies, just enough so each bit has been touched with the oil. There’s no need to saturate the veggies though b/c stirring will help get the oil everywhere throughout the cooking time. Salt and pepper over the entire pan sparingly b/c you can always add more afterwards. I’ve always found the garlic and the slight caramelizing that happens with the veggies in olive oil during the cooking process give more than enough flavor and have never needed to add more seasoning afterwards. Cook for about 30-40 minutes, stirring two or three times at ten minute intervals. You’ll know it’s done when the sweet potatoes are soft and there are a few brown bits on the leeks. This is also a great breakfast/brunch dish with a fried egg or two, or can be spread on a tortilla after smashing with a fork (cook for longer time for softest veggies), add cheese and have yourself a nutrient-packed vegetable quesadilla.

For those celebrating, have a great Thanksgiving. Celebrating gratitude is indeed a beautiful thing, though Thanksgiving can bring about many other feelings for people rather than thankfulness~ holiday stress, food stress, family stress, and financial stress. I hope it’s stress free for you and yours and if it does cause anxiety, reach for help and don’t be afraid to say no to traditions and expectations that aren’t resonating for you anymore.

Take care and may your season be happy, healthy, and filled with light.


Dairy-Free Creamy Cauliflower Soup

I originally wrote this recipe for Basmati.com which has a wealth of Ayurvedic inspired wellness information, but I wanted to share it here too because it is one of my favorite soups. It has several steps but it is all very easy to do and it’s worth it, trust me. I’m not one of those people who embraced using cauliflower as rice or as any kind of grain substitute as was all the rage for a while there, so I’m not a huge lover of all things cauliflower, but this soup is delicious. The garlic and leeks are what really make it special so I add in a lot of those, but you can definitely tone it down if you don’t care for the allium family that much. Garlic is so healthy for the cardiovascular system and also for keeping germs and viruses away though that I recommend large doses if you can handle it.

In a family with gluten, dairy, soy, egg, and nut intolerances, indulging in creamy anything is quite rare. My oldest son and I are big soup lovers, though, and he especially loves creamy soups, so I’ve tried my hand at several vegan recipes using coconut milk, but we just aren’t always in the mood for the subtle taste of coconut. I’ve discovered that with enough olive oil in the cooking process, and by roasting the veggies first, we can end up with a creamy soup without any dairy or dairy alternatives whatsoever – and the taste is truly superb. It is one of those meals that you have to remind yourself is actually incredibly healthy –  just veggies, olive oil, herbs, and spices –  because it really does taste like a decadent treat. Here’s the recipe:

Creamy Roasted Cauliflower Soup

  • 1 medium to large head of cauliflower
  • 1 large leek
  • 2-4 cloves of garlic, depending on taste (I use 4 because I like it good and garlicky)
  • 1 small-medium yellow onion
  • 4 cups of vegetable stock
  • About 2-3 Tbs olive oil
  • ½-1 tsp sea salt
  •  Several turns of fresh ground pepper to taste (you can always add more, so start on the smaller side)
  • 1 tsp or more Herbs d’Provence or thyme

Preheat oven to 425 degrees Fahrenheit and pour olive oil onto a cookie sheet (or some other roasting pan) and rub it around until the bottom is covered, or cover the bottom with parchment paper. Chop the cauliflower and leek up into bite size pieces and put them on the pan to roast with the garlic cloves. Pour olive oil on top of the vegetables, trying to make sure each piece has been touched. I do this by pouring the oil in a crisscross fashion over the pan, and then I roast the vegetables for about 30 minutes, turning them over once or twice during that time. They will be done when there are brown bits on top in places.

Meanwhile, chop the onion and sauté it in about 1 Tbs olive oil in a large pot on medium-high heat until translucent (about 3 minutes).This is also when I like to put the salt, pepper, and herbs d’Provence (or thyme) in the pot, but remember: you can also add more salt and pepper later, so start with small amounts. The soup is so flavorful with the garlic that you might be surprised at how little salt in particular that you need.

Add the four cups of vegetable stock to the pot and bring to a quick boil before turning it down. When the vegetables are finished roasting in the oven, put them in the pot of soup and let it all simmer together for about 5 minutes before turning off the burner and letting it cool a bit prior to blending. Pour the soup into a blender and watch it turn into creamy deliciousness in less than a minute, and then taste to make sure it has enough salt and pepper to your liking.

This soup is best with an herb-y bread to dip into it, such as focaccia or rosemary bread. I usually make my own focaccia style bread sticks with Trader Joe’s flat breads by adding olive oil, some seasoning salt, rosemary, basil, and oregano to the top of the flat breads and baking them at 425 for 10 minutes.

Canyon Bakehouse has a delicious gluten-free and dairy-free focaccia also, but if you can eat gluten I recommend rosemary bread such as The Essential Baking Company’s yummy version.

Please share this with anyone who might be interested, and please subscribe for a weekly wellness post if you haven’t already. It’s free and you can unsubscribe any time.  Happy Halloween to all who celebrate!


Smoothie Recipes

When I first started really trying to kick food intolerances, I began making protein smoothies for breakfast because my naturopath and my own research into healing food intolerances made it clear that protein is vital. That was years ago but I still do it every single day because I have found my blood sugar stays stable with a big dose of protein to start my metabolism in the morning. It’s an excellent way to take herbs too, powdered or tinctured, and I like to sneak in as many greens as possible. Now I’m making two smoothies in the morning in an effort to get more protein into my youngest before he goes off to school because he says he gets hungry before lunchtime. I sneak greens into there as well, and some herbs too. The first recipe is what I make for myself.

Berry Green Protein Smoothie

1 T. of chia seeds

1 teaspoon herbal adaptogen mix and 1/2 t. digest mix (optional but recommended)

1 leaf of kale torn into pieces or a handful of spinach

1 scoop Vanilla Protein Powder by Vega

1/2 of a frozen banana

around 3/4 cups frozen berries

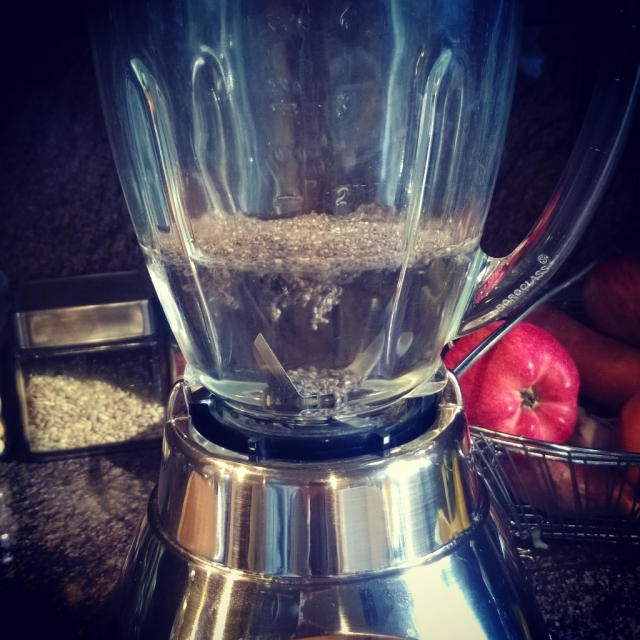
First I fill the blender with 1 cup of cold water (more or less) and add 1 T. of chia seeds and let them soak for about 10 minutes. Chia seeds soaking

Next I add my 1 teaspoon herbal adaptogen mix and 1/2 t. digest mix,

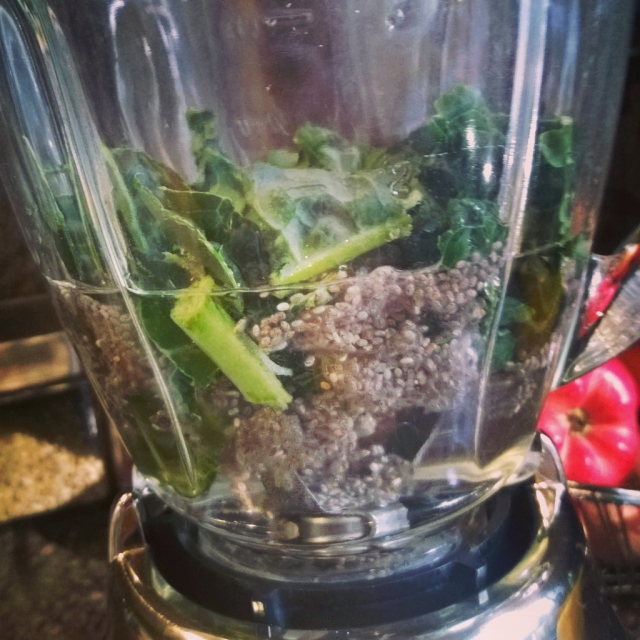
then about 1 leaf of kale or a handful of spinach if I am out of kale.

Kale added

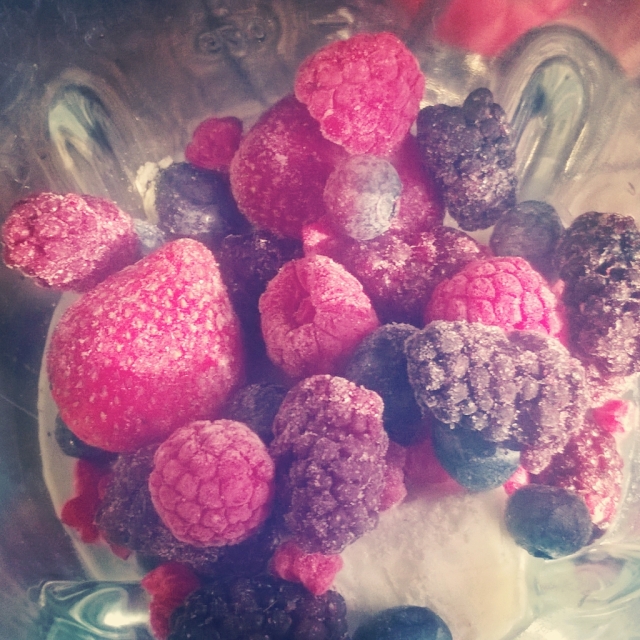
Next the protein powder goes in, along with about half a frozen banana (I freeze them myself) and about 1 C of frozen mixed berries. I use Vanilla Protein Powder by Vega because my naturopath recommended it when our family was avoiding a whole slew of foods due to intolerances. It is a vegan protein powder that is exceptionally tasty and clean, with greens built in.

Frozen fruit

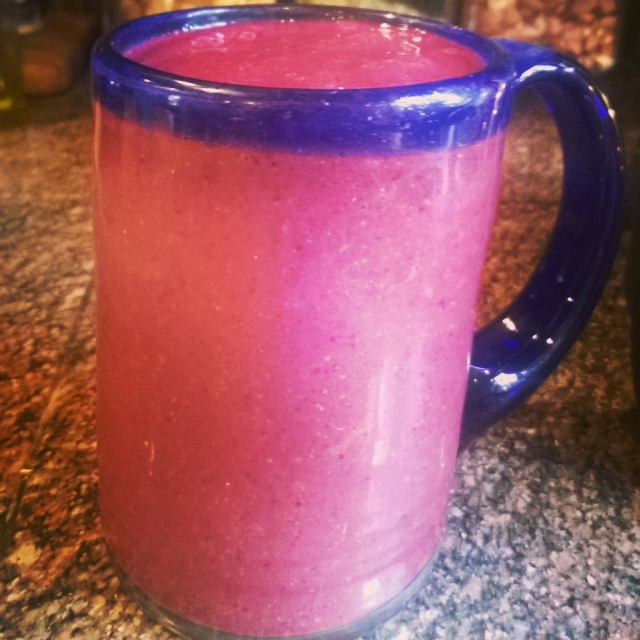
After that I warn anyone nearby that I’m starting the blender because it’s loud. Feel free to replace the water and seeds with milk of choice in either of these recipes.

Berry Green smoothie

The following smoothie recipe is more kid friendly because of the vanilla yogurt, and I put in less greens and herbs. The yogurt makes this smoothie fluffier and more whipped. My youngest still gives me a little bit of a hard time about it and drinks less of a serving than I would like, but the rest of the family happily drinks all of theirs so it’s worth it.

Strawberry Vanilla Smoothie 

1 tablespoon ground flax seeds

1/2 teaspoon adaptogen mix (optional)

1/2 teaspoon digest mix (optional but highly recommended)

Small handful of spinach or kale (optional)

1/2 cup Vanilla Siggi’s Yogurt

one scoop of Vega’s Vanilla Protein Powder

1 frozen banana

1.5 cups frozen strawberries

1/4 teaspoon vanilla extract (optional)

Fill the blender with 1 cup or so of water and 1 tablespoon ground flax seeds. Let the seeds soak for about 10 minutes. Add 1/2 teaspoon adaptogen mix and 1/2 teaspoon digest mix. Next goes in a small handful of spinach (as long as no one is looking!) and 1/2 cup Vanilla Siggi’s Yogurt which is full of protein and not too much sugar. Add a scoop of Vega’s Vanilla Protein Powder, a frozen banana, and about 1.5 cups of frozen strawberries and 1/4 teaspoon vanilla extract if you want. Blends up to be enough for three servings, one of which is rather small though.

WP_20181010_06_37_53_Pro[1]

My youngest also insists that the smoothie tastes *much* better when sucked through a straw. We have a few plastic straws left in our house from bygone years, but now I wouldn’t buy them even if I could find them. I went looking for eco-friendly alternatives and only found metal ones, which will hopefully work for his very discerning taste buds, but I found these other alternatives in an article by Delicious Living which I want to try out, especially the 10 inch smoothie straw. Here are the eco-friendly straws from the article:

EcoStraw 10-inch Smoothie Straw:

ecostraw

Hewn in the United States, this Pyrex, dishwasher-safe straw is wider than standard straws to accommodate viscous liquids like smoothies.

Susty Party Paper Straws:

sustystraws

Compostable in municipal facilities, each beautiful, celebratory 7.75-inch straw comes from renewable, sustainably harvested paper. Plus, they’re made in the U.S.A.

CocoStraw Stainless Steel Drinking Straws:

cocostraw

Made with food-grade stainless steel, these unbreakable straws are perfect replacements for plastic varieties. Each four-pack comes with a cleaner, too.

Seattle is one of the first cities to ban plastic straws and utensils, but hopefully these disposable items will be nothing but a thing of the past soon. Might as well get used to the more eco-friendly alternatives now.

Please share with anyone who might be looking for a new smoothie recipe or plastic straw alternatives, and please subscribe for weekly wellness blog posts.


Iron

There used to be a point in many afternoons when I’d feel so fatigued that it was sickening. A full-body tiredness that if I did not lie down and close my eyes it’d take all my faculties to keep functioning. This would often happen shortly before I’d have to meet my kids at the bus stop and I’d worry that I wouldn’t have the energy to get out there, or even fall asleep and miss it. When I talked to my doctor about this, she attributed it to my being a busy mom and said I was probably just tired for understandable reasons like pretty much all moms out there. I tried to explain it was beyond a regular tired feeling, but in any case it was dropped. I brought it up with my naturopath who checked my thyroid levels (my thyroid levels are checked yearly because of a family history of low thyroid anyway) and a whole slew of other levels that had the person taking my blood rather shocked at the number of vials she had to fill. The naturopath attributed the fatigue to sub-optimal hormone production across the board, a lack of protein, and my multiple food intolerances. And actually, all those things could have been the reason for the fatigue, except that they weren’t.

When my youngest son went to that same naturopath, she immediately knew he needed an iron supplement because he was not a big meat eater, nor a big greens eater. And here’s the catch with the greens, it is hard for the body to absorb iron from greens, and greens as well as iron supplements should always be accompanied by vitamin C, either a supplement or in food form. Plus my son had food intolerances which meant that his digestive system was impaired, another indication one might need iron supplementation. When I did further research on iron for him, it occurred to me that I had all the symptoms of low iron too, so I started taking the same liquid iron that he did and guess what- that sickening afternoon fatigue went away.

You see, in all those blood tests, iron was ignored even though my naturopath and I talked ad nauseum about my being vegetarian or pescatarian for most of my life and she was the one who got me to eventually add chicken and turkey to my diet, after about five years of insistence, to help build up lifelong deficiencies. (I’m still squeemmish about the poultry, but my naturopath would actually like me to eat liver and beef, so it’s a compromise.) My physician also was aware of my dietary habits but has never to this day ordered an iron test. But when I told both of them that my fatigue was better with iron supplementation, they both had the same reaction of, “oh, that makes total sense.” It’s not just my experience either. I’ve talked to several women of child bearing years who don’t eat any or much meat who have never had their iron tested. It just doesn’t seem to be a common test doctors think to run.

So I’m harping on about this because it is just my way of saying, you might need to ask for your iron to be checked if you have a mostly vegetarian or vegan diet, are a woman in child bearing years or are currently pregnant, have Celiac disease, IBS, or any other digestive system disorder, have heavy periods or internal bleeding, or have unexplained fatigue or other symptoms. It just seems to be one of those things that you have to be your own advocate on because it doesn’t seem to be en vogue for medical practitioners to think about iron straight away. If you need another reason to look into your iron levels, running low contributes to anxiety and cloudy brain.

It seems like iron maybe got a bad rap, or at least regulated to the ‘no need for supplementation’ space because too much iron causes constipation and ‘too much’ is likely more common in America than too little, considering the amount of red meat most Americans traditionally consume. I don’t know how it is in other countries, but most multivitamins/minerals here are iron free with the assumption being you’ll eat plenty of it in your daily diet. Those food habits are changing though, and thoughts on iron haven’t quite caught up with the decrease in red meat consumption and the increase of digestive disorders. It’s important to keep in mind though that even just taking an iron supplement can cause constipation if you aren’t taking the right kind. An interesting thing about combining iron with vitamin C is that while iron can be constipating, vitamin C can have the opposite effect, so not only does the C help the body absorb the iron, it actually helps counter the potential negative digestive effects.

The best way to take iron though, for both absorption and for avoiding constipation, is to take a liquid form.  Flora, Garden of Life, and Gaia all make liquid iron supplements that are much easier for the body to assimilate than pills, and the vitamin C is included in the formulations. I prefer the taste of Gaia’s but iron is just never going to be a great tasting liquid so consider yourself warned. If my picky son was able to drink it when he was around age 6 though, anyone can do it  And it is worth it to feel like you are fully functioning all day long, instead of battling fatigue and other confusing symptoms.

There are several herbs high in iron as well, such as Nettle and Dandelion. Both of those herbs are known as blood builders and purifiers with the added bonus of being excellent for your skin. Both are often taken to combat skin issues such as eczema. The leaves of each can be eaten fresh in salads (be careful of nettle’s little stingers), made into an herbal pesto, or the dry leaves make a delicious tea, either separate or combined. Tinctures and pill forms are also available and considering we are quickly approaching the season where we find nettles and dandelions growing wild, that also means it’s traditionally the best season to take these two herbs. Eating seasonally and locally applies to herbs too after all.

Best health to you and yours and please subscribe for weekly posts about herbs, natural health, and green beauty, and please share with anyone who might benefit from this article.


Gluten Free Peasant Bread and Quiche

If you are following a gluten-free diet, then you know how hard it is to find a good peasant bread, or really any bread that feels special enough for holiday events or gifting. This peasant bread recipe is that something special. It is easy enough for novice bakers and can be made into an herb bread if desired. The texture is perfect for accompanying soups and salad, or just cutting off a piece and adding any sort of spread on it. I’ve  never had to toast this bread and I seriously cannot say that about any other gluten-free bread I’ve had, even the loaves of fresh bread from a nearby gluten-free bakery. Since spring brings with it Easter, Passover, Equinox celebrations, and Mother’s Day, I thought this would be a good time to share the recipe here although I have it on my previous blog so it might sound familiar to some of you. It’s the most visited post on that site by far.

The actual how-to will take you to another blog where I found a regular bread recipe that sounded like it’d be a good fit for gluten-free flours. This is because it is a no-knead bread, and that works well for gluten-free breads since kneading is done to activate gluten’s stickiness, but other flours do not react the same way. Gluten-free breads are always made with several different flours and starches in an effort to mimic that ‘glue’ that gluten naturally gives to wheat, rye, and barley. I use a lot of oat flour in my breads but you can substitute other gf flours or even just go with a gf bread mix such as one from Jovial, Pamela’s, or Manini’s. I find the bread turns out best with the flour combination below, but the pre-made mixes are great in a pinch, though if you do use one, adjust the salt according to how much the mix already has in it. (You’ll have to do a bit of educated guesswork.) Those three websites all have great recipes by the way, so if you are looking for more gluten-free ideas, check them out.

For the Peasant Bread, follow this link to the how-to, but replace the flour with: 1.5 C of gluten-free oat flour, 1 C millet flour, 1/2 C tapioca starch, 1/2 C brown rice flour, and 1/2 C sorghum flour. You can add 1 teaspoon of xanthan gum or psyllium husk powder for a more even texture if you wish, and I replaced greasing the bowls with butter with olive oil to make the bread dairy free. When greasing the pyrex bowls, really layer it on because I’ve ruined several crusts with not enough oil on the bowls. I think it works even better to spray the bowls with either coconut oil or olive oil instead of just using the liquid version so you can really layer it on. Whatever you use, use a lot. If you aren’t gluten free, try it in the original form and let me know if it’s good that way too. I bet it is and it’s so easy!

peastantbreadpeastantbread1peastantbread2

Make this bread with the quiche recipe below for a special holiday meal or just to make a regular weekday feel special.

This quiche recipe from Delicious Living sounds perfect for Easter Morning brunch, but the way Amy Palanjian has written it makes it actually a great weekday option as well because you can make it ahead of time and just grab on busy mornings. Either way, it’s naturally gluten-free without substitutions. Here’s the full recipe courtesy of Delicious Living.

Herb and Goat Cheese Crustless Quiches-promo
Picture is Palanjian’s

Thyme’s vibrant flavor enhances mild goat cheese and eggs and aromatically complements parsley’s steady flavor. Make these easy, egg-based bites up to three days in advance, and store in the fridge for a quick power breakfast on busy days.

Ingredients:

  • 1 shallot
  • 1 cup packed and shredded baby spinach or kale
  • ½ cup lightly packed, minced fresh parsley
  • 2 tablespoons fresh thyme leaves
  • 8 eggs
  • ½ cup crumbled goat cheese
  • ½ cup low-fat (1 percent) cottage cheese
  • ⅓ cup cornmeal
  • ½ teaspoon salt

Directions:

  1. Preheat oven to 375°, and grease a standard muffin tin with cooking spray.
  2. Chop shallot, greens, parsley and thyme in a food processor. Stir together with remaining ingredients in a medium bowl. Divide evenly into prepared pan, filling each cup about two-thirds full.
  3. Bake for 20–22 minutes. Remove from oven, let cool for 2 minutes in pan, and run a paring knife around edges to loosen. Serve warm.

PER SERVING: 87 cal, 4g fat (2g mono, 1g poly, 2g sat), 127mg chol, 201mg sodium, 5 carb (0g fiber, 0g sugars), 7g protein

Please subscribe for weekly posts about herbs, natural health, and green beauty, and please share with anyone who might benefit from this article.