New Foods and Supps for Health

The New Hope Blogger Box always has great gluten free goodies in it, and this month’s was no exception. I love granola and was thrilled to find Jessica’s Gluten Free Chocolate Chip Granola in the box because if there is anything better than granola, it’s granola with chocolate chips. This is a delicious treat for breakfast or an afternoon snack, with just right amount of sweetness. I ate it with unsweetened vanilla coconut yogurt or milk with a half teaspoon of my anti-inflammatory digestive spice mix.

My oldest son was thrilled with these unique Tahini Bars from the company Mighty Sesame. These are gluten free and only 100 calories a bar, and make for a nutty tasting, not-too-sweet snack or even a dessert. These bars come in different flavors but we tried the Pistachio Halva Bar and it was a hit, especially with my son who has taken all but one in his lunch bag. (I managed to grab that one for myself!)

Swanson Health’s Vanilla Protein Powder is packed with 20 grams of vegan sourced protein and one serving of veggies. I used this in the smoothies I make every morning and it blended in nicely and tastes good. It has 120 calories per serving which is similar to the other vegan protein I regularly use, and zero sugars. One bag has 20 servings in it.

My oldest son agreed to be the guinea pig for a natural deodorant by Prep U Products. He is almost 15, bikes uphill 1.75 miles to school everyday, and has PE there every day as well. He then bikes home. He also has sensitive skin and we have been through at least five (or more) brands of natural deodorants to find one that works and doesn’t irritate his skin. This deodorant works for him. It is gentle enough not to irritate, and yet it actually works throughout the day despite his physical activities off and on all day long. This is a golden find.

Here’s a supplement to get you fully transitioned out of cold and flu season safely and healthfully. Nature’s Answer has combined elderberry extract with probiotics which specifically target the immune system to create a powerful immune support supplement. This has 32,000 mg elderberry (which is an herb traditionally used to boost the immune system) per serving as well as 10 billion cfu probiotics. This is a great supplement to have on hand through cold and flu system and it doesn’t even need to be refrigerated. The directions are to take two per day with food or water.

Two bars that deserve mentioning are Hemp Health’s Cookie Dough Hemp Bar and gt brands’ good Snacks! Chocolate Peanut Butter protein bar. The hemp bar uses hemp for the main protein source and is quite tasty with a surprisingly good nutrition profile, including a decent amount of iron. It also has 12 grams of protein per bar, 5 grams of fiber and 4 grams of sugar. They have several flavors and other hemp products as well. The good snacks’ chocolate and peanut butter bar is delicious with a nod towards Reese’s peanut butter cups, though not as sweet. These have 15 grams of protein, 11 grams of fiber, and 9 grams of sugar. Both of the bars are gluten free, soy free, and vegan.

I’ve posted about Bellucci’s Olive Oil before, but in case you missed it, these olive oil packets are perfect for lunch bags, camping, or picnics. Now that spring is finally officially here (in the Northern hemisphere anyway) nothing sounds better than some outdoors noshing. With Bellucci you can actually trace your olive oil from the batch number to its roots so you know you have an authentic product, which is important because there is a surprising amount of oil out there masquerading as EVOO.

Thank you for reading and I hope you see something new to try. Happy Equinox!

Gluten-Free Vegan Chocolate Chip Scones

The other day I was working on some herbal crafts for a class I’ll be teaching in a couple of weeks, and things were not quite working out as I wanted. I was starting to get frustrated, and for some reason thought that trying to work out a new gluten-free, vegan scone recipe might be just the answer. It could have turned out badly, adding to the list of creative projects gone wrong, or at least sub-par, that day, but luckily, these turned out good. Really good in fact. These rival the gluten-free, vegan scones we used to be able to get at a local bakery which just closed last month, and they came together quickly~ no refrigerating the dough or anything that makes a more time consuming baking project. You can make these with butter and milk if you aren’t interested in keeping these dairy free, and two eggs will work instead of the flax meal + water. The cinnamon is optional but it gives the dough extra pizzazz. I used Bob’s Red Mill’s Gluten-Free Baking and Biscuit Mix which is a self-rising flour mix. If you don’t used Bob’s, pick another mix that is self-rising, such as Pamela’s.

Gluten-free, Vegan Chocolate Chip Scones

2 1/2 cups Gluten-Free Baking and Biscuit Mix (Bob’s Red Mill)

1/2 teaspoon of Sea Salt

1/4 cup sugar

2 teaspoons baking powder

6 tablespoons coconut oil, kept solid (room temperature)

3/4 cup coconut milk (I like unsweetened vanilla but you can use any kind of milk you wish)

2 tablespoons of flax meal mixed with 6 tablespoons of warm water (or 2 eggs)

2 teaspoons vanilla extract (or make your own)

1 teaspoon cinnamon powder

1 1/2 cups chocolate chips

Preheat the oven to 400°F. Line a baking sheet with parchment paper. In a small bowl, add the water to the flax meal and set aside for about 10 minutes. In a bigger bowl, whisk together the flour, salt, sugar, cinnamon, and baking powder until thoroughly combined. Add the coconut oil, working it in until the mixture is unevenly crumbly. There will still be a lot of loose, dry flour at this point. Whisk together the coconut milk and vanilla  with the flax mixture and then add it to the dry ingredients, along with the chocolate chips. Thoroughly mix.

3614622A-26DD-414F-A306-9725AC4019B3

Transfer the dough to a floured work surface. Gently pat and round it into a circle. Cut the dough into 8 shapes, or more for mini-scones. 

CA091EA1-8964-466E-B2D9-984234B96E82

Put the scones spaced-out evenly on the prepared pan.
WP_20190118_06_31_31_Pro

Bake the scones for 20 minutes, until they’re golden brown. Remove them from the oven, and let cool on a wire rack after first cooling about 5 minutes on the pan.

Store in the fridge in an airtight container and eat within three days, or put them in the freezer.

These scones are by far the easiest, quickest scones I’ve ever made. When you are in the mood to bake something but don’t have much time, these should definitely be on your go to easy-bake list. Please share with anyone who bakes gluten-free goodies, and subscribe for a weekly wellness post.


Roasted Sweet Potatoes

Just a quick recipe this week that can be a healthy side at your Thanksgiving meal. With all the complicated foods that can be part of the meal prep, this one is thankfully straight-forward and simple with just chopping taking up most of the time. Truthfully though, we eat this dish all winter long because it’s so tasty that it’s kind of addictive actually. The garlic is really what makes it so special so add as many cloves as you like, and any kind of sweet potato works, including the ones called yams.

Roasted Sweet Potatoes with Leeks and Garlic

4 sweet potatoes

1 large leek

at least 6 garlic cloves but as many as you want

olive oil to cover

black pepper to taste

sea salt or seasoning salt to taste (I use the seasoning salt and it’s also really delicious with eggs, fish, and any vegetable dishes.)

Preheat oven to 425. Cut the sweet potatoes up into bite size pieces and spread on an oiled cookie sheet or use parchment paper. Spread the cut up leek on top of the sweet potatoes and place the garlic cloves all around. Pour olive oil over the veggies, just enough so each bit has been touched with the oil. There’s no need to saturate the veggies though b/c stirring will help get the oil everywhere throughout the cooking time. Salt and pepper over the entire pan sparingly b/c you can always add more afterwards. I’ve always found the garlic and the slight caramelizing that happens with the veggies in olive oil during the cooking process give more than enough flavor and have never needed to add more seasoning afterwards. Cook for about 30-40 minutes, stirring two or three times at ten minute intervals. You’ll know it’s done when the sweet potatoes are soft and there are a few brown bits on the leeks. This is also a great breakfast/brunch dish with a fried egg or two, or can be spread on a tortilla after smashing with a fork (cook for longer time for softest veggies), add cheese and have yourself a nutrient-packed vegetable quesadilla.

For those celebrating, have a great Thanksgiving. Celebrating gratitude is indeed a beautiful thing, though Thanksgiving can bring about many other feelings for people rather than thankfulness~ holiday stress, food stress, family stress, and financial stress. I hope it’s stress free for you and yours and if it does cause anxiety, reach for help and don’t be afraid to say no to traditions and expectations that aren’t resonating for you anymore.

Take care and may your season be happy, healthy, and filled with light.


Dairy-Free Creamy Cauliflower Soup

I originally wrote this recipe for Basmati.com which has a wealth of Ayurvedic inspired wellness information, but I wanted to share it here too because it is one of my favorite soups. It has several steps but it is all very easy to do and it’s worth it, trust me. I’m not one of those people who embraced using cauliflower as rice or as any kind of grain substitute as was all the rage for a while there, so I’m not a huge lover of all things cauliflower, but this soup is delicious. The garlic and leeks are what really make it special so I add in a lot of those, but you can definitely tone it down if you don’t care for the allium family that much. Garlic is so healthy for the cardiovascular system and also for keeping germs and viruses away though that I recommend large doses if you can handle it.

In a family with gluten, dairy, soy, egg, and nut intolerances, indulging in creamy anything is quite rare. My oldest son and I are big soup lovers, though, and he especially loves creamy soups, so I’ve tried my hand at several vegan recipes using coconut milk, but we just aren’t always in the mood for the subtle taste of coconut. I’ve discovered that with enough olive oil in the cooking process, and by roasting the veggies first, we can end up with a creamy soup without any dairy or dairy alternatives whatsoever – and the taste is truly superb. It is one of those meals that you have to remind yourself is actually incredibly healthy –  just veggies, olive oil, herbs, and spices –  because it really does taste like a decadent treat. Here’s the recipe:

Creamy Roasted Cauliflower Soup

  • 1 medium to large head of cauliflower
  • 1 large leek
  • 2-4 cloves of garlic, depending on taste (I use 4 because I like it good and garlicky)
  • 1 small-medium yellow onion
  • 4 cups of vegetable stock
  • About 2-3 Tbs olive oil
  • ½-1 tsp sea salt
  •  Several turns of fresh ground pepper to taste (you can always add more, so start on the smaller side)
  • 1 tsp or more Herbs d’Provence or thyme

Preheat oven to 425 degrees Fahrenheit and pour olive oil onto a cookie sheet (or some other roasting pan) and rub it around until the bottom is covered, or cover the bottom with parchment paper. Chop the cauliflower and leek up into bite size pieces and put them on the pan to roast with the garlic cloves. Pour olive oil on top of the vegetables, trying to make sure each piece has been touched. I do this by pouring the oil in a crisscross fashion over the pan, and then I roast the vegetables for about 30 minutes, turning them over once or twice during that time. They will be done when there are brown bits on top in places.

Meanwhile, chop the onion and sauté it in about 1 Tbs olive oil in a large pot on medium-high heat until translucent (about 3 minutes).This is also when I like to put the salt, pepper, and herbs d’Provence (or thyme) in the pot, but remember: you can also add more salt and pepper later, so start with small amounts. The soup is so flavorful with the garlic that you might be surprised at how little salt in particular that you need.

Add the four cups of vegetable stock to the pot and bring to a quick boil before turning it down. When the vegetables are finished roasting in the oven, put them in the pot of soup and let it all simmer together for about 5 minutes before turning off the burner and letting it cool a bit prior to blending. Pour the soup into a blender and watch it turn into creamy deliciousness in less than a minute, and then taste to make sure it has enough salt and pepper to your liking.

This soup is best with an herb-y bread to dip into it, such as focaccia or rosemary bread. I usually make my own focaccia style bread sticks with Trader Joe’s flat breads by adding olive oil, some seasoning salt, rosemary, basil, and oregano to the top of the flat breads and baking them at 425 for 10 minutes.

Canyon Bakehouse has a delicious gluten-free and dairy-free focaccia also, but if you can eat gluten I recommend rosemary bread such as The Essential Baking Company’s yummy version.

Please share this with anyone who might be interested, and please subscribe for a weekly wellness post if you haven’t already. It’s free and you can unsubscribe any time.  Happy Halloween to all who celebrate!

Subscribe to my YouTube Channel


Smoothie Recipes

When I first started really trying to kick food intolerances, I began making protein smoothies for breakfast because my naturopath and my own research into healing food intolerances made it clear that protein is vital. That was years ago but I still do it every single day because I have found my blood sugar stays stable with a big dose of protein to start my metabolism in the morning. It’s an excellent way to take herbs too, powdered or tinctured, and I like to sneak in as many greens as possible. Now I’m making two smoothies in the morning in an effort to get more protein into my youngest before he goes off to school because he says he gets hungry before lunchtime. I sneak greens into there as well, and some herbs too. The first recipe is what I make for myself.

Berry Green Protein Smoothie

1 T. of chia seeds

1 teaspoon herbal adaptogen mix and 1/2 t. digest mix (optional but recommended)

1 leaf of kale torn into pieces or a handful of spinach

1 scoop Vanilla Protein Powder by Vega

1/2 of a frozen banana

around 3/4 cups frozen berries

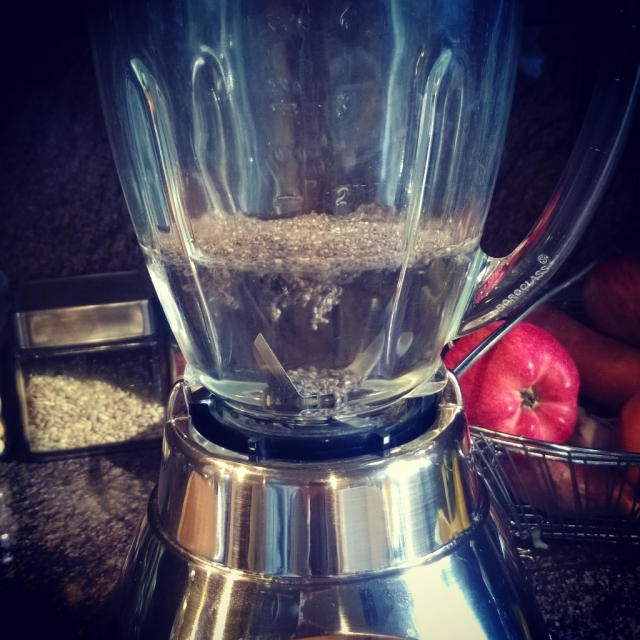
First I fill the blender with 1 cup of cold water (more or less) and add 1 T. of chia seeds and let them soak for about 10 minutes. Chia seeds soaking

Next I add my 1 teaspoon herbal adaptogen mix and 1/2 t. digest mix,

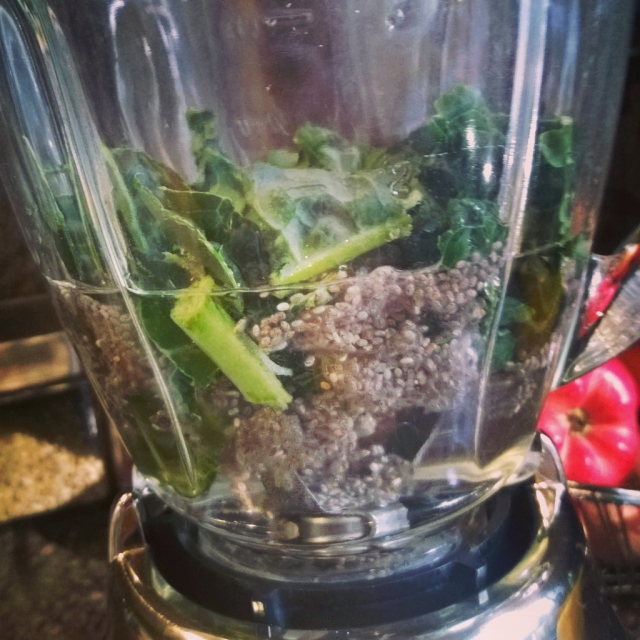
then about 1 leaf of kale or a handful of spinach if I am out of kale.

Kale added

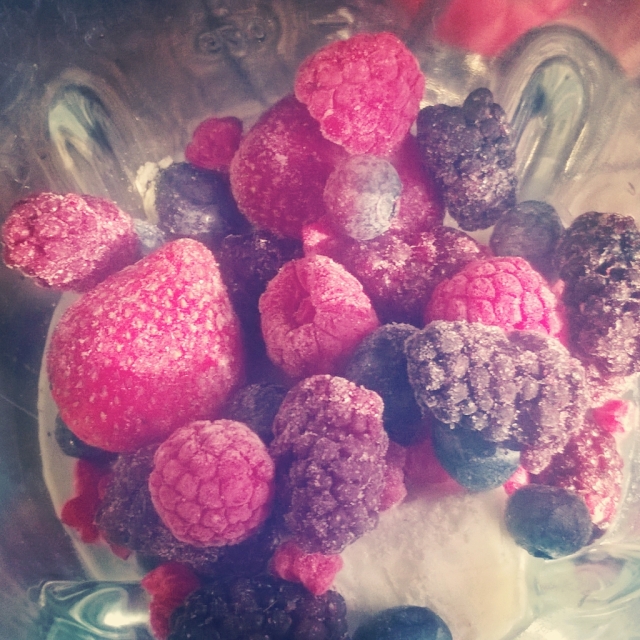
Next the protein powder goes in, along with about half a frozen banana (I freeze them myself) and about 1 C of frozen mixed berries. I use Vanilla Protein Powder by Vega because my naturopath recommended it when our family was avoiding a whole slew of foods due to intolerances. It is a vegan protein powder that is exceptionally tasty and clean, with greens built in.

Frozen fruit

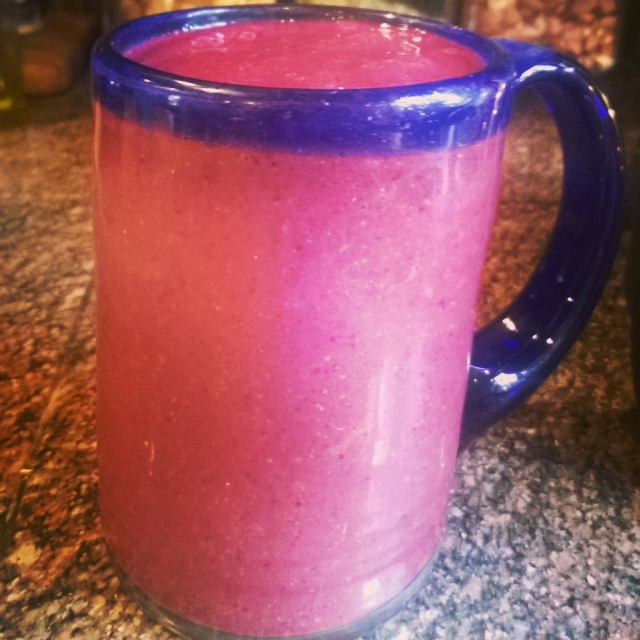
After that I warn anyone nearby that I’m starting the blender because it’s loud. Feel free to replace the water and seeds with milk of choice in either of these recipes.

Berry Green smoothie

The following smoothie recipe is more kid friendly because of the vanilla yogurt, and I put in less greens and herbs. The yogurt makes this smoothie fluffier and more whipped. My youngest still gives me a little bit of a hard time about it and drinks less of a serving than I would like, but the rest of the family happily drinks all of theirs so it’s worth it.

Strawberry Vanilla Smoothie 

1 tablespoon ground flax seeds

1/2 teaspoon adaptogen mix (optional)

1/2 teaspoon digest mix (optional but highly recommended)

Small handful of spinach or kale (optional)

1/2 cup Vanilla Siggi’s Yogurt

one scoop of Vega’s Vanilla Protein Powder

1 frozen banana

1.5 cups frozen strawberries

1/4 teaspoon vanilla extract (optional)

Fill the blender with 1 cup or so of water and 1 tablespoon ground flax seeds. Let the seeds soak for about 10 minutes. Add 1/2 teaspoon adaptogen mix and 1/2 teaspoon digest mix. Next goes in a small handful of spinach (as long as no one is looking!) and 1/2 cup Vanilla Siggi’s Yogurt which is full of protein and not too much sugar. Add a scoop of Vega’s Vanilla Protein Powder, a frozen banana, and about 1.5 cups of frozen strawberries and 1/4 teaspoon vanilla extract if you want. Blends up to be enough for three servings, one of which is rather small though.

WP_20181010_06_37_53_Pro[1]

My youngest also insists that the smoothie tastes *much* better when sucked through a straw. We have a few plastic straws left in our house from bygone years, but now I wouldn’t buy them even if I could find them. I went looking for eco-friendly alternatives and only found metal ones, which will hopefully work for his very discerning taste buds, but I found these other alternatives in an article by Delicious Living which I want to try out, especially the 10 inch smoothie straw. Here are the eco-friendly straws from the article:

EcoStraw 10-inch Smoothie Straw:

ecostraw

Hewn in the United States, this Pyrex, dishwasher-safe straw is wider than standard straws to accommodate viscous liquids like smoothies.

Susty Party Paper Straws:

sustystraws

Compostable in municipal facilities, each beautiful, celebratory 7.75-inch straw comes from renewable, sustainably harvested paper. Plus, they’re made in the U.S.A.

CocoStraw Stainless Steel Drinking Straws:

cocostraw

Made with food-grade stainless steel, these unbreakable straws are perfect replacements for plastic varieties. Each four-pack comes with a cleaner, too.

Seattle is one of the first cities to ban plastic straws and utensils, but hopefully these disposable items will be nothing but a thing of the past soon. Might as well get used to the more eco-friendly alternatives now.

Please share with anyone who might be looking for a new smoothie recipe or plastic straw alternatives, and please subscribe for weekly wellness blog posts.


Iron

There used to be a point in many afternoons when I’d feel so fatigued that it was sickening. A full-body tiredness that if I did not lie down and close my eyes it’d take all my faculties to keep functioning. This would often happen shortly before I’d have to meet my kids at the bus stop and I’d worry that I wouldn’t have the energy to get out there, or even fall asleep and miss it. When I talked to my doctor about this, she attributed it to my being a busy mom and said I was probably just tired for understandable reasons like pretty much all moms out there. I tried to explain it was beyond a regular tired feeling, but in any case it was dropped. I brought it up with my naturopath who checked my thyroid levels (my thyroid levels are checked yearly because of a family history of low thyroid anyway) and a whole slew of other levels that had the person taking my blood rather shocked at the number of vials she had to fill. The naturopath attributed the fatigue to sub-optimal hormone production across the board, a lack of protein, and my multiple food intolerances. And actually, all those things could have been the reason for the fatigue, except that they weren’t.

When my youngest son went to that same naturopath, she immediately knew he needed an iron supplement because he was not a big meat eater, nor a big greens eater. And here’s the catch with the greens, it is hard for the body to absorb iron from greens, and greens as well as iron supplements should always be accompanied by vitamin C, either a supplement or in food form. Plus my son had food intolerances which meant that his digestive system was impaired, another indication one might need iron supplementation. When I did further research on iron for him, it occurred to me that I had all the symptoms of low iron too, so I started taking the same liquid iron that he did and guess what- that sickening afternoon fatigue went away.

You see, in all those blood tests, iron was ignored even though my naturopath and I talked ad nauseum about my being vegetarian or pescatarian for most of my life and she was the one who got me to eventually add chicken and turkey to my diet, after about five years of insistence, to help build up lifelong deficiencies. (I’m still squeemmish about the poultry, but my naturopath would actually like me to eat liver and beef, so it’s a compromise.) My physician also was aware of my dietary habits but has never to this day ordered an iron test. But when I told both of them that my fatigue was better with iron supplementation, they both had the same reaction of, “oh, that makes total sense.” It’s not just my experience either. I’ve talked to several women of child bearing years who don’t eat any or much meat who have never had their iron tested. It just doesn’t seem to be a common test doctors think to run.

So I’m harping on about this because it is just my way of saying, you might need to ask for your iron to be checked if you have a mostly vegetarian or vegan diet, are a woman in child bearing years or are currently pregnant, have Celiac disease, IBS, or any other digestive system disorder, have heavy periods or internal bleeding, or have unexplained fatigue or other symptoms. It just seems to be one of those things that you have to be your own advocate on because it doesn’t seem to be en vogue for medical practitioners to think about iron straight away. If you need another reason to look into your iron levels, running low contributes to anxiety and cloudy brain.

It seems like iron maybe got a bad rap, or at least regulated to the ‘no need for supplementation’ space because too much iron causes constipation and ‘too much’ is likely more common in America than too little, considering the amount of red meat most Americans traditionally consume. I don’t know how it is in other countries, but most multivitamins/minerals here are iron free with the assumption being you’ll eat plenty of it in your daily diet. Those food habits are changing though, and thoughts on iron haven’t quite caught up with the decrease in red meat consumption and the increase of digestive disorders. It’s important to keep in mind though that even just taking an iron supplement can cause constipation if you aren’t taking the right kind. An interesting thing about combining iron with vitamin C is that while iron can be constipating, vitamin C can have the opposite effect, so not only does the C help the body absorb the iron, it actually helps counter the potential negative digestive effects.

The best way to take iron though, for both absorption and for avoiding constipation, is to take a liquid form.  Flora, Garden of Life, and Gaia all make liquid iron supplements that are much easier for the body to assimilate than pills, and the vitamin C is included in the formulations. I prefer the taste of Gaia’s but iron is just never going to be a great tasting liquid so consider yourself warned. If my picky son was able to drink it when he was around age 6 though, anyone can do it  And it is worth it to feel like you are fully functioning all day long, instead of battling fatigue and other confusing symptoms.

There are several herbs high in iron as well, such as Nettle and Dandelion. Both of those herbs are known as blood builders and purifiers with the added bonus of being excellent for your skin. Both are often taken to combat skin issues such as eczema. The leaves of each can be eaten fresh in salads (be careful of nettle’s little stingers), made into an herbal pesto, or the dry leaves make a delicious tea, either separate or combined. Tinctures and pill forms are also available and considering we are quickly approaching the season where we find nettles and dandelions growing wild, that also means it’s traditionally the best season to take these two herbs. Eating seasonally and locally applies to herbs too after all.

Best health to you and yours and please subscribe for weekly posts about herbs, natural health, and green beauty, and please share with anyone who might benefit from this article.


Sweet Potato and Black Bean Tacos Gluten-Free and Vegan

This is a post from around this time of year three years ago from my first blog. I’m hoping to get all the relevant recipes over here now. We actually are not hosting Thanksgiving this year but I still need to bring a few dishes…tacos instead of turkey? Maybe….

Just when I thought I never wanted another corn tortilla again, I got a craving for a taco with some sort of orange veggie in it. Whenever we go out to dinner we often go to one of two places where I order a butternut squash quesadilla. I love them, but I hate dealing with squash and its hard shell that eats knives for lunch so I have never attempted to make them myself. It got me thinking though that wouldn’t a sweet potato taste just as good in that kind of meal? And if I could eliminate the cheese it’d be even better for our family, so onto the web I went and sure enough there are plenty of recipes for sweet potatoes and black beans together in all sorts of fashions~ tacos, burritos, enchiladas, etc. I went the taco route and used several different recipes to cobble together what is written below to work with what I had in my refrigerator. My husband and oldest son loved these by the way, as did I, and my youngest who only gathered enough courage to try one black bean and one piece of sweet potato admitted the black bean wasn’t bad. That says more to me than the fact that my husband is generally not a huge sweet potato fan, nor a big black bean fan, and really he prefers flour tortillas and definitely cheese and preferably meat. This recipe outshined all that. It is a keeper. (Unfortunately, the pics I took are not very good. Next time I make this, I’ll take better ones.)

Vegan, Gluten-free Sweet Potato and Black Bean Tacos

1.5 T vegetable oil (I used sunflower oil and olive oil)

1/2 t salt

1 yellow or red onion (I used red b/c that is what I had and the purple hue was so pretty)

1 pepper (I used 1/2 red pepper and 1/2 yellow pepper, but orange or green would work)

2 cloves garlic, minced

1 medium-large sweet potato

1 can black beans (or 1.5 c if using dried beans)

1 t cumin

freshly ground pepper to taste

corn tortillas

guacamole (or avocados)

Preheat oven to 400. Using a large cast iron pan or some other oven-friendly pan* sauté the onions, peppers, and garlic until the onions are translucent in 1 T of vegetable oil. (I used sunflower oil). In a bowl coat the sweet potato which has been skinned and diced into bite size pieces with 1/2 T of oil (I used olive) and 1/2 t of sea salt. Add this into the sauté pan and cook for 1 minute before transferring into the oven for 15 minutes.

Meanwhile, warm up the rinsed and drained beans on medium with 1 t cumin in a small sauce pan. Also warm up some corn tortillas** until they are soft. Take the pan out of the oven and if the sweet potatoes are cooked through add the beans and stir to get everything mixed together. Load the tortillas and top with guacamole or fresh avocados. It’s a symphony of flavors played just right. If it were up to me this is what I’d make for Thanksgiving, along with kale chips and pica de gallo salsa. It’s enough to make a pilgrim say, “Ole!” but alas, we are hosting this year and I’m going to have to stick to the more traditional items I’ve already planned.


* If you don’t have an oven proof pan, use one that you can top with a lid or plate and add 2 T of water to the mixture to steam it for approximately 5-10 min.

** I use Trader Joe’s corn tortillas b/c they are thick and sturdy, plus they are remarkably clean. Their ingredient list is all of: ground white corn masa flour, water, trace of lime. That’s it. Exactly how it should be. And they taste incredibly good, much better than any other corn tortilla on the market.

Please subscribe for weekly posts about herbs, natural health, and green beauty, and please share this with anyone who might be interested.